
Introduction
You know those desserts that just make you feel at home? That’s banana pudding. It’s nostalgic, creamy, and downright irresistible. Whether it’s Grandma’s Sunday spread or the go-to dish at a summer potluck, banana pudding never disappoints. But let’s be honest—some versions are meh, and others? Absolute heaven. Today, we’re diving into what makes the best banana pudding ever and how you can make it from scratch, step-by-step.
A Brief History of Banana Pudding
The Southern Roots of a Classic
While banana pudding is enjoyed across the country, it has deep Southern roots. The dessert gained popularity in the late 19th century, especially in Southern cookbooks. It’s simple, uses easy-to-find ingredients, and layers comfort like no other dish.
How It Evolved Over Time
Originally made with sponge cake or ladyfingers, it eventually embraced vanilla wafers as the go-to. Over time, boxed pudding mixes became common, but nothing beats homemade custard. The dish has evolved, sure, but it remains a soulful staple in American cuisine.
Ingredients Matter
Choosing the Perfect Bananas
This isn’t the time for green bananas. You want them yellow with tiny brown specks—just ripe enough for sweetness and flavor but still firm for slicing.
Vanilla Wafers or Ladyfingers?
Vanilla wafers are iconic, but if you’re feeling fancy, ladyfingers offer a more European flair. Whichever you choose, make sure they’re fresh and crisp; they’ll soften just right when layered.
The Importance of Homemade Pudding
Boxed pudding is easy—but homemade custard is what takes this dessert from good to legendary. It’s creamy, rich, and full of vanilla flavor that boxed versions just can't touch.
Whipped Cream vs. Meringue Topping
Purists love meringue; it’s traditional and adds elegance. But whipped cream is creamier and easier to make. Choose your fighter.
Tools You’ll Need
No need for fancy gadgets—just a few kitchen basics:
- Mixing bowls
- A whisk
- Saucepan
- Spatula
- Glass trifle bowl or casserole dish
The Secret to the Best Banana Pudding Ever
The Layering Technique
Layering is an art. Start with wafers, add bananas, then pudding. Repeat. Be generous with each layer but keep it balanced.
Letting It Chill for Maximum Flavor
Here’s the kicker—don’t rush it. Let it chill for at least 4 hours (overnight is even better). This lets the flavors marry and the wafers soften perfectly.
Step-by-Step Banana Pudding Recipe
Step 1: Gather Your Ingredients
- 5 ripe bananas, sliced
- 1 box vanilla wafers
- 4 cups whole milk
- 1 cup granulated sugar
- 1/3 cup all-purpose flour
- 6 egg yolks
- 1 tbsp vanilla extract
- 1/4 tsp salt
- 2 cups whipped cream or meringue
Step 2: Make the Custard from Scratch
In a saucepan, combine sugar, flour, and salt. Gradually whisk in milk. Cook over medium heat, stirring constantly until thick. Whisk egg yolks in a separate bowl, then slowly temper them with the hot mixture. Return to heat and stir until thick and bubbly. Remove from heat, stir in vanilla.
Step 3: Slice the Bananas Right
Slice bananas evenly—not too thin, not too thick. You want sturdy slices that won’t go mushy too fast.
Step 4: Layer Like a Pro
In your dish, begin with a layer of wafers, followed by bananas, then custard. Repeat until the dish is full.
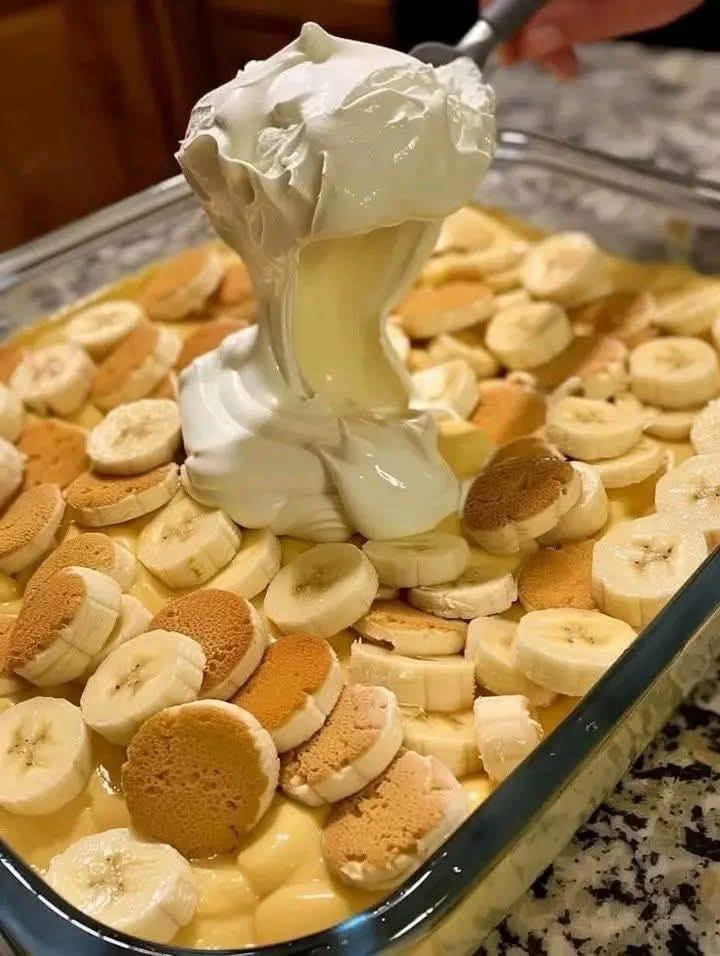
Step 5: Top It Off!
Finish with a generous layer of whipped cream or browned meringue. You can even sprinkle crushed wafers on top for crunch.
Step 6: Chill and Serve
Cover and refrigerate for at least 4 hours. The longer it rests, the better it gets.
Common Mistakes to Avoid
- Overripe Bananas – They’ll turn to mush and overpower the dish.
- Soggy Wafers – Letting it sit too long or layering while custard is too hot will ruin texture.
- Rushing the Chill Time – The magic happens in the fridge.
Creative Variations to Try
- Chocolate Banana Pudding – Add layers of chocolate ganache or cocoa in the custard.
- Peanut Butter Swirl – Add dollops of peanut butter between layers.
- Vegan or Dairy-Free – Use coconut milk and dairy-free cookies for an allergy-friendly twist.
Banana Pudding for Special Occasions
Perfect for potlucks, picnics, or family reunions, banana pudding is a crowd-pleaser. Serve it in individual mason jars or a giant trifle bowl with flair.
How to Store and Keep it Fresh
Cover tightly with plastic wrap and store in the fridge for up to 4 days. Want to freeze it? You can, but the texture may change.
Nutritional Info and Health Tips
Each serving (approx. 1 cup) contains around 300-400 calories. For a lighter version, use low-fat milk, less sugar, and skip the whipped topping.
What People Say About This Recipe
“This is the only banana pudding my kids ask for.”
“My grandma said it tasted just like hers from back in the day.”
“I brought it to a BBQ, and it was gone in 10 minutes.”
Conclusion
Banana pudding is one of those timeless desserts that just hits different. From its humble Southern roots to your family’s kitchen table, it’s the kind of dish that brings comfort and joy with every bite. When made right—with love, care, and the perfect balance of creamy custard and ripe bananas—it truly becomes the best banana pudding ever. So go ahead, give this recipe a try and watch it become a family favorite for years to come.
FAQs
1. Can I make banana pudding a day ahead?
Yes! In fact, it’s better that way. It gives the flavors time to meld.
2. How long does banana pudding last?
It stays fresh in the fridge for about 3–4 days, but best within the first 2.
3. What’s the best substitute for vanilla wafers?
Ladyfingers or shortbread cookies work well. Graham crackers can also be a fun twist.
4. Can I use instant pudding?
You can, but homemade custard makes a huge difference in taste and texture.
5. How do I keep bananas from turning brown?
Toss banana slices in a little lemon juice before layering to slow oxidation.