
The Allure of Homemade Bread
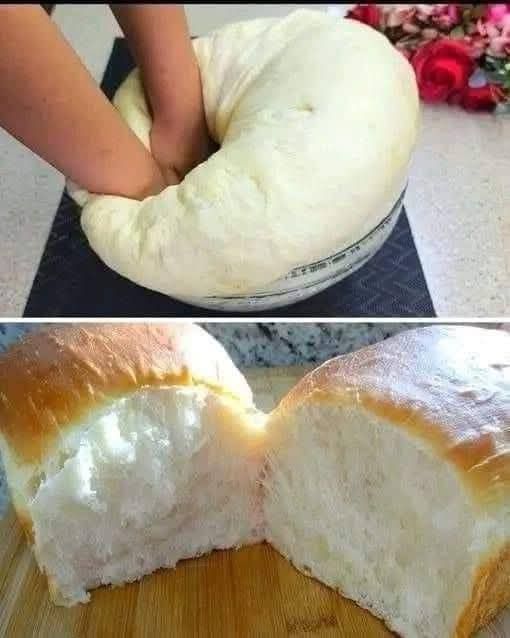
There's something irresistibly comforting about soft and fluffy bread, fresh from the oven. That golden crust, the pillowy interior, and the warm, yeasty aroma can turn a simple moment into something truly special. Whether it's served with butter, jam, or used for sandwiches, soft homemade bread never goes out of style. This article will walk you through a foolproof, step-by-step method for making incredibly fluffy bread using common ingredients.
If you've ever wanted to make bakery-quality bread in your kitchen, you're in the right place. This guide uses easy-to-follow instructions, and with a bit of patience, you’ll enjoy the satisfaction of creating bread that's light, tender, and deliciously soft.
Ingredients for Soft and Fluffy Bread
Before you start, gather your ingredients. Each component plays an important role in ensuring that your bread turns out light and airy.
Basic Ingredients:
- 4 cups all-purpose flour (plus more for dusting)
- 2 ¼ teaspoons active dry yeast (1 packet)
- 1 cup warm milk (110°F or 43°C)
- ¼ cup granulated sugar
- ¼ cup unsalted butter (softened to room temperature)
- 1 large egg (room temperature)
- 1 teaspoon salt
- 2 tablespoons vegetable oil (for greasing)
- Additional butter (for brushing the top)
The Importance of Ingredient Temperature
Make sure your milk is warm but not hot. If it’s too hot, it will kill the yeast. If it's too cold, the yeast won’t activate properly. Room-temperature ingredients blend better and help the dough rise evenly. Don’t skip this detail—temperature can make or break your bread.
Step-by-Step Instructions
Now let’s dive into the process. Follow these steps exactly for soft, fluffy results every time.
Step 1: Activate the Yeast
In a large mixing bowl, pour in the warm milk. Stir in the sugar until dissolved. Add the yeast and let it sit for about 5–10 minutes. You’ll know it’s active when it becomes foamy and bubbly. If there’s no foam, your yeast might be expired—start over with fresh yeast.
Step 2: Combine Wet Ingredients
Once the yeast is activated, mix in the softened butter, salt, and egg. Stir well until everything is fully combined. Use a wooden spoon or a dough hook on your stand mixer for best results.
Step 3: Add the Flour Gradually
Begin adding the flour one cup at a time. Stir continuously until a dough starts to form. It should be slightly sticky but not overly wet. If the dough is too wet, sprinkle in more flour, one tablespoon at a time.
Step 4: Knead the Dough
Transfer the dough to a lightly floured surface. Knead it for about 8–10 minutes, or until it becomes smooth and elastic. If using a mixer, knead on medium speed for 6–8 minutes. The dough should spring back when poked.
Step 5: First Rise
Place the dough in a lightly greased bowl. Cover it with a clean kitchen towel or plastic wrap. Let it rise in a warm, draft-free area for 1 to 1.5 hours, or until it doubles in size. This is where the fluffiness begins.
Punching Down and Shaping the Dough
Step 6: Punch Down the Dough
Once your dough has doubled, gently punch it down to release the built-up air. This prevents large air pockets in your bread. Then turn it out onto a floured surface.
Step 7: Shape the Dough
Divide the dough into two equal parts for two loaves, or shape it into rolls or buns. Use loaf pans or a baking tray lined with parchment paper for best results. Make sure your shapes are even to ensure uniform baking.
Step 8: Second Rise
Cover the shaped dough with a towel and let it rest again for 30–40 minutes. The dough will puff up and hold its shape better during baking. Don’t skip this second rise—it’s key to a soft, airy texture.
Baking the Bread
Step 9: Preheat the Oven
Preheat your oven to 350°F (175°C) while the dough is undergoing its second rise. A properly preheated oven ensures your bread bakes evenly.
Step 10: Bake to Perfection
Place your loaves or rolls in the oven and bake for 25–30 minutes. The tops should turn a beautiful golden brown. Tap the top—if it sounds hollow, it’s done. For a shinier, softer crust, brush with melted butter immediately after removing from the oven.
Cool and Serve
Let the bread cool on a wire rack for at least 15–20 minutes before slicing. This prevents it from becoming gummy and ensures clean cuts. Slice, spread with butter, or use it for your favorite sandwiches. Enjoy the warm, fluffy goodness!
Expert Tips for Softer, Fluffier Bread
Use Bread Flour When Possible
While all-purpose flour works well, bread flour creates even fluffier bread thanks to its higher protein content. It strengthens the gluten network, giving you better structure and softness.
Add Tangzhong (Optional)
This Japanese technique involves cooking a portion of the flour and water into a paste before adding it to the dough. It locks in moisture and keeps bread soft for days.
Don’t Overwork the Dough
While kneading is essential, over-kneading can make the bread tough. Knead just until smooth and elastic.
Hydration Matters
Slightly sticky dough usually leads to lighter bread. Too much flour can dry out your loaf. Stick with a slightly tacky texture.
Common Mistakes to Avoid
- Cold ingredients: Always use room-temperature eggs and butter.
- Skipping the second rise: It’s essential for fluffiness.
- Not testing the yeast: Inactive yeast equals flat, dense bread.
- Opening the oven too soon: This can deflate your dough.
- Using too much flour: Leads to dry, dense bread.
Creative Variations
Once you master the base recipe, try fun variations:
- Honey Oat Bread: Add rolled oats and a tablespoon of honey.
- Garlic Herb Bread: Mix in minced garlic and chopped herbs.
- Cheesy Pull-Apart Bread: Stuff the dough with shredded cheese.
- Cinnamon Swirl Bread: Add a layer of cinnamon and sugar before rolling.
- Milk Bread (Hokkaido-style): Use Tangzhong and whole milk for ultra-soft texture.
How to Store Soft Bread
Soft bread is best eaten fresh but stores well, too.
- At Room Temperature: Store in a bread box or airtight container for up to 3 days.
- Freezing: Slice and freeze in an airtight bag. Reheat in a toaster or oven.
- Avoid Refrigeration: It dries out bread faster.
Serving Suggestions
- Serve warm with butter or jam for breakfast.
- Use it for gourmet sandwiches.
- Toast it and top with avocado or eggs.
- Make French toast or bread pudding with leftovers.
- Serve alongside soups or stews.
Why This Bread Recipe Works
This bread stands out for its cloud-like texture, buttery flavor, and irresistible aroma. The balance of ingredients ensures moisture retention without compromising structure. It’s versatile enough to adapt to sweet or savory additions, and the method is beginner-friendly yet professional in results.
Whether you’re baking for the first time or adding to your bread repertoire, this recipe delivers every time.
Final Thoughts
Making soft and fluffy bread at home isn’t complicated—it just requires the right technique and a little patience. From activating the yeast to kneading the dough and baking to perfection, every step contributes to the final product. This bread is perfect for everyday use, yet impressive enough for special occasions.
Once you try this recipe, you may never go back to store-bought bread again. Share it with your family, gift it to a neighbor, or simply enjoy it with a cup of tea. Every slice is a bite of comfort.