
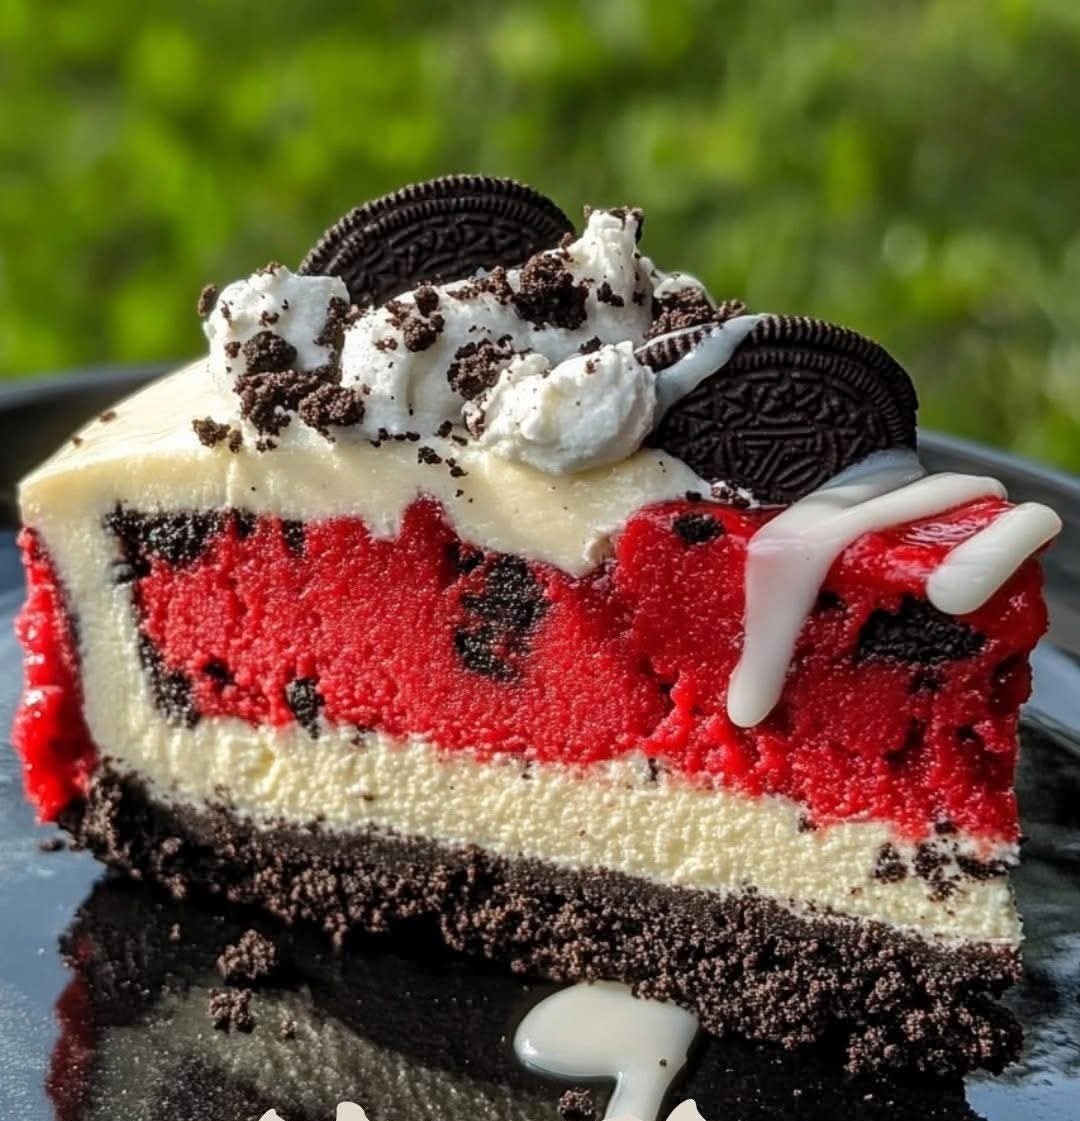
Cheesecake lovers and red velvet enthusiasts, rejoice! If you're looking for a show-stopping dessert that combines the classic richness of cheesecake, the bold flavor of red velvet, and the irresistible crunch of Oreos, you're in for a treat. This Red Velvet Oreo Cheesecake is not only visually stunning with its vibrant red hue, but it also delivers a decadent taste experience with layers of texture and flavor.
Whether you're preparing for a holiday celebration, birthday party, or simply indulging in some self-care baking, this cheesecake will leave your guests amazed—and your taste buds begging for more.
Why Red Velvet and Oreo?
Before diving into the recipe, let’s explore why this combination works so beautifully.
Red velvet: A classic Southern dessert known for its slight cocoa flavor, moist texture, and iconic red color. It pairs wonderfully with cream cheese, making it a natural fit for cheesecake.
Oreos: With their chocolatey crunch and sweet cream filling, Oreos add depth and contrast in texture. When used as a crust or mix-in, they complement the richness of the cheesecake perfectly.
Cheesecake base: Smooth, creamy, and tangy—cheesecake provides a luxurious mouthfeel that balances the boldness of the red velvet and the crunch of the cookies.
Now, let’s get into the step-by-step recipe.
Ingredients
Here’s everything you’ll need:
For the Crust:
18 Oreo cookies (original, with filling)
1/4 cup (60g) unsalted butter, melted
For the Cheesecake Filling:
24 oz (680g) cream cheese, softened to room temperature (3 standard 8 oz blocks)
1 cup (240g) sour cream
1/2 cup (100g) granulated sugar
3 large eggs, room temperature
1 1/2 teaspoons vanilla extract
1 cup (120g) red velvet cake mix (dry mix, not prepared)
8 Oreo cookies, roughly crushed
For the Topping (Optional):
1/2 cup whipped cream
4–5 Oreo cookies, crushed for garnish
Tools You’ll Need
9-inch springform pan
Electric or stand mixer
Food processor or a rolling pin and zip-top bag
Mixing bowls
Spatula
Aluminum foil (for water bath, optional)
Baking sheet or roasting pan (if using a water bath)
Step-by-Step Instructions
Step 1: Prepare the Oreo Crust
- Preheat your oven to 325°F (160°C).
- Place 18 Oreo cookies into a food processor and pulse until you get fine crumbs. If you don’t have a food processor, place the cookies in a zip-top bag and crush them using a rolling pin.
- Melt the butter and mix it with the crushed Oreos in a bowl until all crumbs are evenly coated and resemble wet sand.
- Press the mixture into the bottom of your 9-inch springform pan, creating an even, compact layer.
- Bake the crust for 10 minutes, then remove it from the oven and let it cool.
Tip: You can place parchment paper on the bottom of the pan to make transferring the cheesecake easier later.
Step 2: Make the Cheesecake Filling
- In a large mixing bowl, beat the softened cream cheese until smooth and creamy. This step is crucial—smooth cream cheese ensures a lump-free batter.
- Add the sour cream and mix until well combined.
- Pour in the granulated sugar and beat again until smooth.
- Add the vanilla extract.
- Crack in the eggs one at a time, mixing on low speed after each addition. Avoid overmixing, which can cause cracks in the cheesecake.
- Gradually add the dry red velvet cake mix to the batter and mix until just incorporated.
- Fold in the 8 roughly crushed Oreo cookies using a spatula. This will create little bursts of cookie flavor throughout the cake.
Step 3: Assemble and Bake
- Pour the cheesecake batter into the cooled Oreo crust and smooth out the top with a spatula.
- Optional but recommended: Wrap the outside of the springform pan with aluminum foil and place it in a water bath (a larger roasting pan filled with hot water halfway up the sides). This helps bake the cheesecake gently and evenly, reducing the risk of cracks.
- Bake the cheesecake for 55 to 60 minutes. You’ll know it’s done when the edges are set but the center is still slightly jiggly.
- Turn off the oven and crack the door open. Let the cheesecake cool inside the oven for 1 hour. This slow cooling process helps prevent cracking.
Step 4: Chill
- After cooling in the oven, remove the cheesecake and refrigerate it for at least 4 hours, preferably overnight. This allows it to set fully and develop its flavor.
Step 5: Add the Topping (Optional but Delicious)
- Before serving, top the cheesecake with whipped cream. You can pipe it around the edges or spread it over the entire surface.
- Sprinkle crushed Oreos on top for a decorative and flavorful touch.
Serving Tips
Use a sharp knife dipped in hot water for clean slices.
Serve with a drizzle of chocolate or raspberry sauce for extra decadence.
Store leftovers in an airtight container in the refrigerator for up to 5 days.
Storage and Make-Ahead Instructions
Fridge: Cheesecake stays fresh in the refrigerator for up to 5 days. Store it covered or in an airtight container.
Freezer: You can freeze the whole cheesecake or individual slices for up to 3 months. Wrap tightly in plastic wrap and foil, then place in a freezer-safe container. Thaw overnight in the refrigerator before serving.
Troubleshooting Tips
Cracks on top: This can happen due to overmixing or baking at too high a temperature. Using a water bath and letting the cheesecake cool gradually helps avoid this.
Lumpy batter: Make sure your cream cheese is fully softened and beat it thoroughly before adding other ingredients.
Overbaking: The center should still jiggle slightly when done. It will continue to firm up as it cools.
Customizations and Variations
Red velvet swirl: Reserve some plain batter and swirl it with red velvet batter for a marbled look.
Mini cheesecakes: Use a muffin tin with cupcake liners to make individual portions. Adjust baking time to about 18–22 minutes.
Chocolate ganache topping: For a richer finish, pour a layer of ganache over the chilled cheesecake before serving.
Nutritional Info (Approximate per slice, serves 12)
Calories: 450–500
Fat: 30g
Carbs: 40g
Sugar: 28g
Protein: 6g
Note: These numbers are estimates and can vary depending on brands and serving size.
Conclusion
This Red Velvet Oreo Cheesecake is a dream come true for dessert lovers. It’s a rich, creamy, and flavorful indulgence that brings together the best of three worlds: the smooth texture of classic cheesecake, the subtle cocoa note of red velvet, and the satisfying crunch of Oreo cookies.
Perfect for special occasions, holidays, or simply treating yourself, this dessert is as delightful to look at as it is to eat. Once you try it, don’t be surprised if it becomes your go-to cheesecake recipe.