
Introduction: Embracing the Timeless Charm of Old Fashioned Fudge
Old fashioned fudge isn't just a sweet treat—it's a memory in every bite. For generations, families have passed down this cherished chocolate confection, sharing it during holidays, special occasions, or just cozy nights at home. With its smooth, velvety texture and deep cocoa flavor, old fashioned fudge remains a dessert favorite that never goes out of style. Whether you grew up making it with a grandparent or are just discovering the tradition, this guide will walk you through every detail to craft the perfect batch from scratch.
If you're ready to fill your kitchen with the comforting aroma of melted chocolate and sugar, let's dive into this rich and satisfying fudge journey.
The Essential Ingredients for Traditional Fudge
To make the perfect batch of old fashioned fudge, you'll need only a few simple but high-quality ingredients. Choosing the right components is crucial for that authentic flavor and creamy finish. Here’s what you’ll need:
- 3 cups granulated white sugar
- ¾ cup unsalted butter (cut into cubes)
- ⅔ cup evaporated milk (not sweetened condensed milk)
- 1 jar (7 oz) marshmallow crème
- 1 package (12 oz) semi-sweet chocolate chips
- 1 tsp pure vanilla extract
- Optional: 1 cup chopped walnuts or pecans
Each of these ingredients plays an important role. The sugar and evaporated milk form the base, while the butter adds richness. The marshmallow crème helps provide that smooth, melt-in-your-mouth texture, and the chocolate chips bring deep cocoa flavor. Nuts add crunch and balance the sweetness, but you can skip them if you prefer smooth fudge.
How to Make Old Fashioned Fudge: Step-by-Step Instructions
Making old fashioned fudge requires patience and precision, but the process is straightforward. Follow these steps for consistent, delicious results.
1. Prepare Your Pan
Start by lining a 9x13-inch baking pan with parchment paper or foil. Lightly grease it with butter or non-stick spray to ensure the fudge doesn’t stick. Leave some overhang on the sides so you can lift the fudge out easily once it sets.
2. Combine Sugar, Butter, and Evaporated Milk
In a large heavy-bottomed saucepan over medium heat, combine the sugar, butter, and evaporated milk. Stir constantly with a wooden spoon or heatproof spatula. This part is critical—burned sugar can ruin the whole batch.
Continue stirring until the butter melts and the mixture comes to a full boil.
3. Boil to Soft-Ball Stage
Once boiling, reduce the heat slightly and keep stirring for 4–5 minutes. The mixture needs to reach 234°F (112°C), which is the soft-ball stage in candy making. Use a candy thermometer to measure precisely. If you don't have a thermometer, drop a small spoonful into cold water. If it forms a soft ball that flattens when touched, it’s ready.
4. Add Chocolate and Marshmallow Crème
Immediately remove the saucepan from heat. Stir in the chocolate chips until they are completely melted. Then, add the marshmallow crème and vanilla extract. Stir briskly until the mixture becomes glossy and smooth.
5. Stir in Nuts (Optional)
If you're using chopped nuts, fold them in now. They give the fudge a lovely crunch and a nutty, earthy undertone that contrasts well with the rich chocolate.
6. Pour and Let Set
Pour the hot fudge into your prepared pan. Use a spatula to spread it evenly into the corners. Let the fudge cool at room temperature, undisturbed, for about 3–4 hours or until fully set. For quicker setting, you can refrigerate it, but letting it set at room temperature gives the best texture.
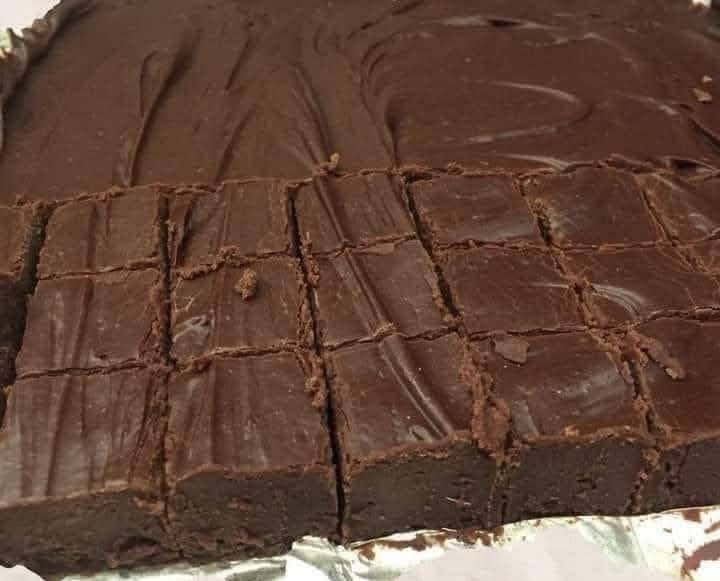
7. Slice and Serve
Once the fudge is firm, lift it out using the parchment paper. Place it on a cutting board and slice it into 1-inch squares using a sharp knife. Clean the knife between cuts for neat, even edges.
Top Tips for the Best Old Fashioned Fudge
Making fudge may seem intimidating, but with a few expert tips, you can avoid the most common pitfalls.
- Use a heavy-bottomed saucepan. This ensures even heat distribution and prevents burning.
- Don’t stop stirring. Constant stirring helps the mixture cook evenly and prevents scorching.
- Use a thermometer. Precision is key. Fudge needs to hit the soft-ball stage or it won’t set properly.
- Work quickly once off heat. The mixture will start to thicken fast. Stir in the remaining ingredients right away.
- Don’t refrigerate too soon. Allowing fudge to set at room temperature creates a better texture.
Why Old Fashioned Fudge Stands the Test of Time
In today’s fast-paced world, homemade desserts can feel like a lost art. But old fashioned fudge brings us back to the essence of home cooking. It’s indulgent without being overly complicated, sweet but not cloying, and endlessly customizable.
The satisfaction of making it from scratch is just as enjoyable as eating it. Unlike store-bought candies, this homemade fudge has personality. Each batch has a story. Each square brings a bit of love and nostalgia to those who enjoy it.
Flavor Variations to Try
While the classic version is delightful, you can get creative with your fudge recipes. Here are some mouthwatering variations:
1. Peanut Butter Fudge
Add ½ cup creamy peanut butter to the hot fudge mixture for a nutty twist. It pairs beautifully with chocolate.
2. Mint Chocolate Fudge
Add ½ tsp mint extract and a few drops of green food coloring. Top with crushed candy canes for a holiday vibe.
3. Rocky Road Fudge
Stir in mini marshmallows and chopped almonds for a chewy, crunchy, gooey experience.
4. Salted Caramel Fudge
Drizzle caramel sauce on top before setting and sprinkle with flaky sea salt. This adds a sweet-salty balance.
5. Espresso Fudge
Add 1 tbsp instant espresso powder to the boiling sugar mixture. It enhances the chocolate flavor and adds a sophisticated twist.
Each of these variations keeps the spirit of old fashioned fudge while adding a fresh dimension of flavor.
Perfect Occasions for Serving Old Fashioned Fudge
Old fashioned fudge fits beautifully into almost any occasion. Here are just a few moments where it truly shines:
- Holiday gatherings – Fudge is a staple on holiday dessert tables.
- Birthdays – Use it as a party favor or dessert bite.
- Gifting – Wrap pieces in wax paper and place them in decorative tins.
- Potlucks – Fudge travels well and doesn’t require refrigeration.
- Date nights – Pair it with wine or coffee for a decadent touch.
Storing and Freezing Fudge for Freshness
Proper storage ensures your fudge stays creamy and delicious for weeks.
How to Store Fudge
Keep your fudge in an airtight container at room temperature. It stays fresh for up to two weeks. Use parchment paper between layers to prevent sticking.
Can You Freeze Fudge?
Yes! Wrap individual pieces in plastic wrap and place them in a freezer-safe bag or container. Fudge freezes well for up to 3 months. When ready to enjoy, thaw it at room temperature for a few hours.
Healthier Alternatives and Substitutions
If you're looking to lighten up this dessert or accommodate dietary needs, consider these adjustments:
- Sugar substitutes: Use erythritol or stevia blends for a low-sugar version.
- Dairy-free: Use plant-based butter and coconut milk instead of dairy ingredients.
- Dark chocolate: Choose 70% cocoa chips for a richer and less sweet option.
- Nut-free: Simply omit nuts or replace them with seeds like sunflower or pumpkin.
While it won’t be identical to the original, these tweaks can offer a guilt-free alternative.
The Legacy of Old Fashioned Fudge
Fudge has been a part of American culinary tradition since the late 19th century. It likely originated in women's colleges as an experiment gone sweetly right. Its popularity soared due to its simplicity and affordability.
Today, old fashioned fudge remains a treasured recipe. Passed down through generations, it connects us to family, tradition, and the comfort of homemade sweetness.
Conclusion: Make Your Own Sweet Memories
Old fashioned fudge is more than just candy—it’s comfort, celebration, and connection. Whether you follow the classic recipe or explore unique variations, you're guaranteed a sweet result.
From the first melt-in-your-mouth bite to the last lick of chocolate from the spoon, every moment is worth savoring. So, grab your saucepan, gather your ingredients, and start your own fudge-making tradition today.
You won’t just be making dessert—you’ll be making memories.