
A Time-Honored Classic Straight From Grandma’s Kitchen
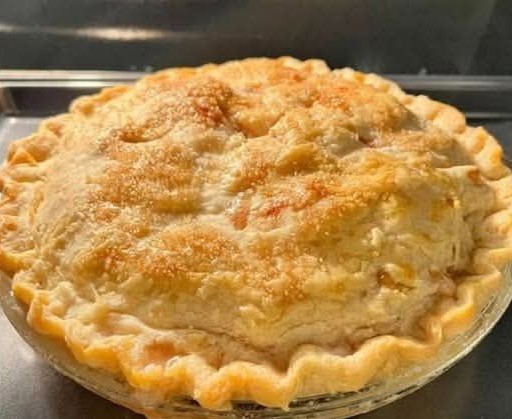
Few things in life bring as much joy as the comforting aroma of a fresh-baked pie wafting from the oven. For me, that feeling always circles back to one beloved treasure—my grandmother’s homemade pie crust. This isn’t just any crust. It’s golden, buttery, flaky, and melt-in-your-mouth delicious. It’s the same pie dough that turned every Sunday supper, holiday feast, and family celebration into a memory.
Her recipe is simple, using ingredients we all have at home, but the technique is what makes it magical. Passed down through generations, her pie crust has become a family heirloom—just as precious as any photo album or handwritten letter.
If you’re on the hunt for the ultimate pie crust recipe that delivers every time, look no further. With her time-tested instructions, you’ll master the art of flaky perfection.
Ingredients That Make All the Difference
To begin your pie-making journey, gather the essentials. Each item plays a vital role in the final result.
You’ll need:
- 2 ½ cups all-purpose flour (unbleached works best)
- 1 teaspoon fine sea salt
- 1 tablespoon granulated sugar (optional for sweet pies)
- 1 cup (2 sticks) unsalted butter, cold and cut into small cubes
- 6–8 tablespoons ice-cold water
Why These Ingredients Work
- Flour: Provides the structure for the dough. All-purpose is ideal for balance.
- Butter: The key to those flaky layers. Cold, solid butter pockets melt during baking to create texture.
- Salt and sugar: Enhance flavor and balance the butter’s richness.
- Ice water: Binds the dough together without warming it. Keeping everything cold ensures flakiness.
Step-by-Step Instructions for Perfect Pie Dough
Step 1: Mix the Dry Ingredients
Start by combining the flour, salt, and sugar in a large bowl. Use a whisk to ensure even distribution. This first step sets the stage for a consistent crust.
Step 2: Cut in the Butter
Add the cold, cubed butter into the flour mixture. Use a pastry cutter or two forks to break the butter into the flour. You’re aiming for a crumbly texture with small pea-sized bits of butter still visible.
Pro tip: Avoid using your hands unless absolutely necessary—they can warm the butter too quickly.
Step 3: Add Ice Water Gradually
Next, drizzle in the ice-cold water one tablespoon at a time. Stir gently after each addition using a fork. You want the dough to hold together when pressed, but not feel sticky.
Do not overmix. The goal is to hydrate the dough just enough to hold its shape.
Step 4: Divide and Chill
Turn the dough onto a floured surface. Gently knead it a few times until it forms a loose ball. Divide into two even disks, wrap tightly in plastic wrap, and refrigerate for at least one hour.
Chilling the dough allows the gluten to relax and the butter to firm up again. This step is essential for a tender, flaky crust.
Rolling, Fitting, and Prepping for the Filling
Once chilled, remove one disk at a time. Lightly flour your surface and rolling pin. Roll the dough into a circle about 12 inches in diameter, roughly ⅛ inch thick.
Carefully transfer the dough to your pie dish. Gently press it into the bottom and sides without stretching. Trim excess dough around the edge, leaving about half an inch to crimp later.
If your recipe requires a double crust (like for apple or cherry pie), roll out the second disk the same way. For a lattice top, cut it into strips and weave over the filled pie.
Blind Baking: When and How
If your pie filling is no-bake or particularly wet (like lemon meringue or chocolate cream), you’ll need to blind bake the crust.
- Prick the bottom with a fork to prevent puffing.
- Line with parchment paper and fill with pie weights or dried beans.
- Bake at 375°F (190°C) for 15 minutes.
- Remove weights and parchment, then bake another 10 minutes until golden.
Blind baking keeps the crust from becoming soggy once filled.
Grandma’s Pie Crust Tips for Flaky Success
Over the years, I learned a few golden rules from Grandma that made all the difference. These timeless tips ensure your crust turns out beautifully every time.
1. Always Keep Ingredients Cold
Butter, water, even the flour—keep everything chilled before you begin. The colder your ingredients, the flakier your crust.
2. Don’t Overwork the Dough
It’s tempting to knead until smooth, but resist the urge. Overworking develops gluten, which leads to a chewy, tough crust.
3. Use a Gentle Touch
From cutting in the butter to rolling out the dough, be gentle. Treat it like a delicate pastry, not bread dough.
4. Let It Rest
Chilling the dough after mixing, and again once it’s fitted in the pan, helps prevent shrinkage and ensures a tender bite.
5. Use the Right Pie Dish
Glass and ceramic dishes conduct heat more evenly than metal. They also let you see when the bottom is golden.
Sweet or Savory: One Crust, Endless Possibilities
This all-butter pie crust is incredibly versatile. With or without sugar, it serves as the perfect foundation for both sweet and savory creations.
For Sweet Pies:
- Apple pie
- Blueberry pie
- Pumpkin pie
- Pecan pie
- Cherry pie
For Savory Pies:
- Chicken pot pie
- Quiche Lorraine
- Tomato pie
- Meat pies
- Spinach and cheese tart
You can even make hand pies or galettes with this same dough.
Freezing and Make-Ahead Instructions
Busy week? Planning for holidays? This pie crust is freezer-friendly.
To store:
Wrap each dough disk tightly in plastic and place in a freezer bag. Label and date.
To use:
Thaw overnight in the refrigerator. Roll out as usual. You can also freeze pie crusts already fitted into pans (unbaked) for up to 2 months.
How to Crimp Like a Pro
Don’t just press the edges with a fork—give your pie a polished look.
- Fluted edge: Pinch with your thumb and forefinger.
- Rope edge: Twist the dough around your finger in small arcs.
- Braided edge: If using extra dough strips, braid and attach to the rim.
Egg wash adds sheen. A sprinkle of sugar gives sparkle and crunch.
Why Grandma’s Recipe Always Wins
There’s no substitute for tradition. My grandmother’s pie crust carries a warmth no store-bought shell can match. The buttery aroma, the delicate crunch, and the rich taste are all proof of its homemade roots.
But it’s more than a recipe. It’s a symbol of love, patience, and pride. Baking this crust brings us closer to family, to memories, and to moments that matter.
It teaches us that the best food doesn’t need to be complicated—it just needs to be made with care.
Final Thoughts: A Crust to Treasure
Whether you’re baking your first pie or your fiftieth, this crust never lets you down. It’s been praised at birthdays, holidays, and every potluck in between. It has cradled fillings of all kinds, stood up to juicy peaches and creamy custards, and earned a special place at every table.