
Introduction
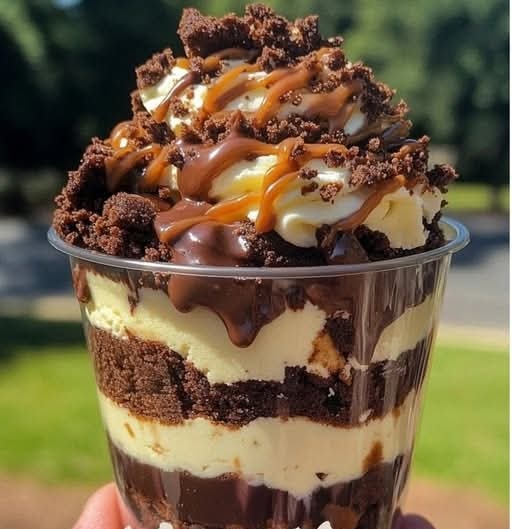
If there’s one dessert that hits every craving – chocolatey, creamy, rich, and bite-sized – it’s the Loaded Brownie Cheesecake Cup. This indulgent treat marries two beloved desserts: gooey brownies and silky cheesecake, finished off with all the toppings your sweet tooth could ever dream of. Whether you're hosting a party, satisfying a late-night craving, or looking for a fun baking project, these little cups of heaven are sure to become your new obsession.
Let’s break down what makes these so special and how to make them step-by-step.
Why You’ll Love Them
Portion Perfect: Served in muffin cups or mini molds, they’re ideal for parties or portion-controlled snacking.
Double Dessert Magic: Rich brownie base + tangy cheesecake center = flavor harmony.
Fully Customizable: Top with chocolate ganache, caramel drizzle, chopped candy, nuts, or fruit.
Make-Ahead Friendly: These cups store beautifully in the fridge or freezer.
Ingredients
For the Brownie Base:
1/2 cup (1 stick) unsalted butter
3/4 cup granulated sugar
1/2 cup light brown sugar, packed
2 large eggs
1 tsp vanilla extract
1/3 cup unsweetened cocoa powder
1/2 cup all-purpose flour
1/4 tsp salt
1/2 cup semi-sweet chocolate chips (optional for extra gooeyness)
For the Cheesecake Layer:
8 oz cream cheese, softened
1/4 cup granulated sugar
1 large egg
1 tsp vanilla extract
2 tbsp sour cream (for a smoother, richer texture)
For the Toppings (optional but highly recommended):
Mini chocolate chips
Crushed Oreos
Chopped Reese’s or Butterfingers
Caramel or chocolate drizzle
Sea salt flakes
Whipped cream or ganache
Step-by-Step Instructions
Step 1: Preheat and Prep
Preheat your oven to 350°F (175°C). Line a muffin pan with cupcake liners or lightly grease a silicone muffin tray for easy removal.
Step 2: Make the Brownie Batter
In a medium saucepan over low heat, melt the butter. Remove from heat and stir in the granulated and brown sugars until smooth. Add in the eggs and vanilla, mixing until fully incorporated.
Sift in the cocoa powder, flour, and salt. Stir until just combined. If you want extra fudginess, fold in the chocolate chips.
Spoon about 1 to 1½ tablespoons of brownie batter into each muffin cup. Spread to cover the bottom. Bake for 5–6 minutes just to set the base slightly. Remove from the oven but keep the oven on.
Step 3: Prepare the Cheesecake Filling
In a mixing bowl, beat the softened cream cheese until smooth and creamy. Add sugar, egg, vanilla, and sour cream. Beat until the mixture is velvety and lump-free.
Spoon cheesecake batter over the pre-baked brownie layer (filling about ¾ of the muffin cup). Tap the pan lightly to remove air bubbles and ensure an even layer.
Step 4: Bake to Perfection
Return to the oven and bake for 15–18 minutes, or until the cheesecake is just set and no longer jiggly in the center. Do not overbake. Let the cups cool in the pan for about 10 minutes, then transfer to a wire rack.
Once cooled, refrigerate for at least 2 hours or until thoroughly chilled.
Topping Time: Load It Up
Here’s where the real fun begins. Once chilled, decorate the tops with your favorite sweet add-ons:
Caramel drizzle + sea salt for a salted caramel twist.
Mini chocolate chips + crushed Oreos for a cookies ‘n cream version.
Ganache topping + whipped cream for a bakery-style finish.
Crushed Butterfingers or Reese’s Pieces for candy-bar lovers.
Drizzle, sprinkle, and swirl to your heart’s content – these are loaded brownie cheesecake cups after all!
Tips for Success
Room Temp Ingredients: Use room-temperature cream cheese and eggs for the creamiest cheesecake.
Don’t Overmix: Overbeating the batter can introduce too much air and cause cracking.
Cool Gradually: Letting them cool slowly helps avoid sunken centers or cracks.
Use a Cookie Scoop: Makes dividing the batter and cheesecake layer super easy and mess-free.
Make Ahead: These cups can be made a day in advance and refrigerated until serving.
Storage & Freezing
In the fridge: Store covered in the refrigerator for up to 5 days.
In the freezer: Freeze the cups individually wrapped in plastic wrap and placed in an airtight container for up to 2 months. Thaw in the fridge overnight before serving.
Flavor Variations to Try
Peanut Butter Swirl: Add a swirl of peanut butter on top of the cheesecake layer before baking.
Mint Chocolate: Use a mint chocolate brownie base and top with crushed Andes mints.
Berry Burst: Spoon in a small dollop of raspberry or strawberry jam into the center of the cheesecake before baking.
S’mores Style: Sprinkle crushed graham crackers and mini marshmallows on top post-bake and toast slightly with a kitchen torch.
Perfect for Any Occasion
These decadent dessert cups are:
Party-Ready: Mini desserts are always a crowd favorite at birthdays, showers, and gatherings.
Bake Sale Favorites: They look gorgeous and transport easily.
Date Night Treats: A perfect sweet ending to a cozy night in.
Holiday Delight: Dress them up with red and green sprinkles, heart candies, or themed toppers.
The Final Bite
The Loaded Brownie Cheesecake Cup is more than a dessert – it’s an experience. A luscious, two-in-one indulgence that hits all the right notes: dense brownie, creamy cheesecake, and a satisfying crunch or drizzle to top it all off. Whether you’re baking for friends, family, or just for fun, these cups promise to steal the spotlight.