
When it comes to indulgent desserts, few things compare to homemade Nutella-filled donuts. These golden, fluffy delights packed with rich, creamy Nutella offer a perfect balance of softness and sweetness that will satisfy any craving. Making these donuts from scratch may seem daunting, but with this comprehensive guide, you’ll discover just how easy and rewarding it can be to create bakery-quality donuts right in your kitchen.
Why Choose Homemade Nutella-Filled Donuts?
Homemade donuts boast fresh, soft textures that store-bought versions often lack. When filled with Nutella, the experience becomes even more delightful. You control the ingredients, ensuring freshness and avoiding preservatives. Additionally, you can customize fillings and toppings to suit your taste. Whether you want a classic powdered sugar finish or a chocolate glaze, homemade allows creativity and flexibility.
Making donuts at home also means you get to enjoy the warm, comforting aroma of fresh-baked goods. Plus, serving these treats to family and friends will impress everyone at breakfast, brunch, or dessert.
Essential Ingredients for the Perfect Donuts
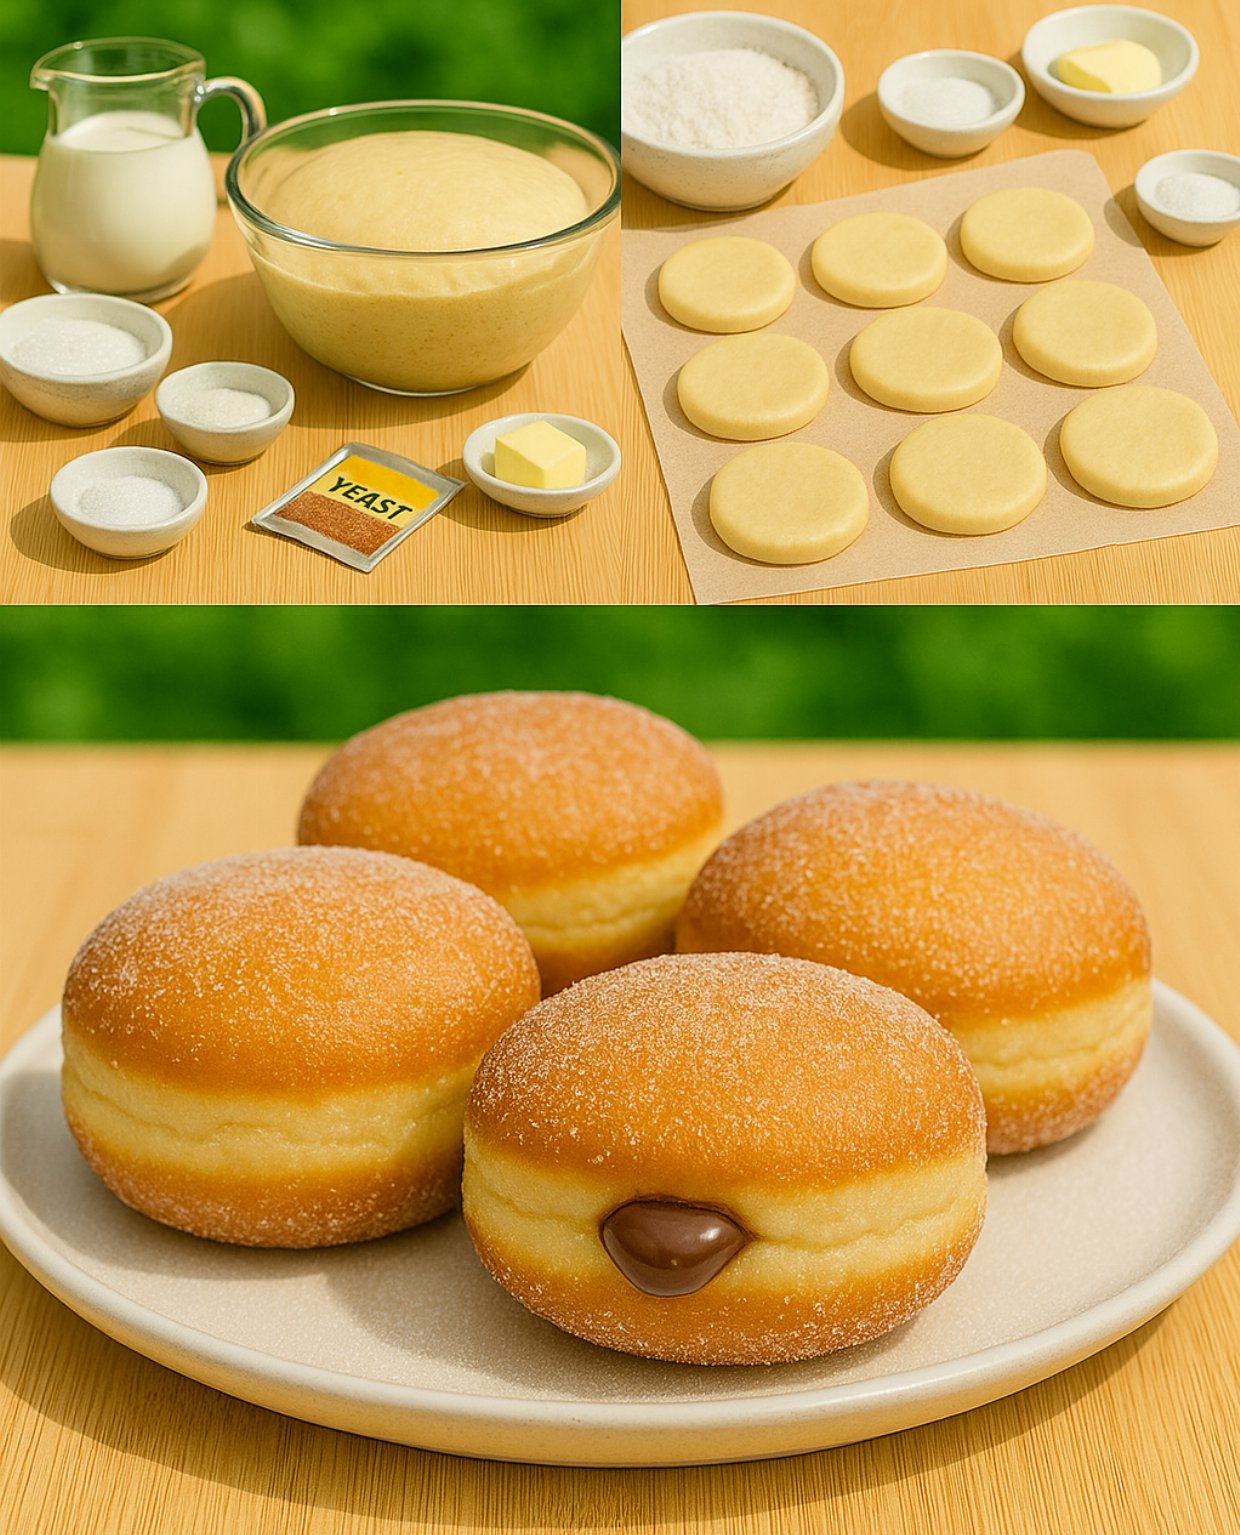
To make soft, airy Nutella-filled donuts, gather the following ingredients:
- 3 ½ cups all-purpose flour
- 2 ¼ teaspoons active dry yeast (one packet)
- ¾ cup warm milk (about 110°F or 43°C)
- ¼ cup granulated sugar
- 2 large eggs
- ½ teaspoon salt
- ¼ cup unsalted butter, softened
- Nutella (or any chocolate-hazelnut spread) for filling
- Vegetable oil for frying
- Powdered sugar for dusting (optional)
Each ingredient plays an important role. Flour provides structure, yeast creates the airy texture, and butter adds richness. The sugar feeds the yeast and sweetens the dough, while eggs improve the softness and binding.
Step-By-Step Instructions for Making Nutella-Filled Donuts
1. Activating the Yeast
Begin by warming the milk to about 110°F (43°C). It should feel warm but not hot to the touch. In a large mixing bowl, combine warm milk and sugar. Sprinkle yeast over the top and let it sit for 5-10 minutes. When the yeast foams or bubbles, it means it’s active and ready to work its magic.
2. Preparing the Dough
Add eggs, softened butter, and salt to the yeast mixture. Gradually stir in the flour, mixing until a sticky dough forms. Transfer the dough onto a lightly floured surface and knead for 8-10 minutes. The dough should become smooth, elastic, and slightly tacky but not sticky.
Kneading is crucial. It develops gluten, which gives donuts their airy texture. If you have a stand mixer, you can use the dough hook attachment to knead the dough for 5-7 minutes.
3. First Rise
Place the kneaded dough in a greased bowl. Cover with a clean kitchen towel or plastic wrap. Let it rise in a warm spot for about 1 hour or until it doubles in size. Rising times can vary depending on room temperature.
During this time, yeast ferments the sugars and produces gas bubbles, causing the dough to expand. This step ensures lightness and softness in the final donuts.
4. Shaping the Donuts
Once the dough has risen, punch it down to release air bubbles. Turn it out onto a floured surface and roll it to about ½-inch thickness. Using a round cutter (about 3 inches in diameter), cut out donut shapes. Unlike traditional donuts, these do not have holes in the center because they will be filled later.
Arrange the dough rounds on parchment paper or a baking sheet. Cover loosely with a towel and let them rise again for 30 minutes. This second rise makes the donuts even fluffier.
5. Frying the Donuts
Heat vegetable oil in a heavy-bottomed pot or deep fryer to 350°F (175°C). Use a candy thermometer to maintain the temperature, as it’s essential for even frying. Carefully place the donuts into the hot oil without overcrowding.
Fry each side for 1 to 2 minutes, or until golden brown. Use a slotted spoon or tongs to flip them gently. Once cooked, transfer the donuts to a paper towel-lined plate to drain excess oil.
6. Filling with Nutella
While the donuts are still slightly warm, fill a piping bag fitted with a small round tip with Nutella. Alternatively, you can use a zip-top bag with a corner cut off. Poke a hole in the side of each donut and carefully pipe Nutella inside, filling until you feel some resistance.
If Nutella is too thick, you can warm it gently to soften it for easier piping. Be careful not to overfill, or the filling will leak out.
7. Finishing Touches
Dust the filled donuts with powdered sugar for a classic look. You can also drizzle melted chocolate or sprinkle crushed hazelnuts on top for extra indulgence.
Tips to Make Perfect Nutella-Filled Donuts Every Time
- Warm Milk Is Key: Ensure the milk is warm enough to activate yeast but not hot to avoid killing it.
- Consistent Oil Temperature: Keep the frying oil steady at 350°F for evenly cooked donuts without greasy texture.
- Don’t Rush Rising Times: Give the dough enough time to double in size for fluffy donuts.
- Use Fresh Yeast: Old or expired yeast won’t rise well. Check the expiration date.
- Drain Excess Oil: Drain donuts properly after frying to avoid sogginess.
Creative Variations to Try
While Nutella filling is a crowd favorite, you can experiment with other delicious fillings and toppings.
- Fruit Jams: Raspberry, strawberry, or apricot add a fruity burst.
- Peanut Butter: Combine peanut butter and jelly for a classic twist.
- Cream Cheese Filling: For a tangy, creamy contrast.
- Lemon Curd: Offers a zesty, refreshing taste.
- Glazes and Sprinkles: Vanilla glaze, chocolate drizzle, or rainbow sprinkles enhance appearance and flavor.
These variations keep your homemade donut experience fresh and exciting.
How to Store and Reheat Nutella-Filled Donuts
Store leftover donuts in an airtight container at room temperature for up to two days. To maintain freshness, place parchment paper between layers.
Reheat by microwaving for 10-15 seconds or warming in a low oven (300°F) for 5 minutes. Avoid prolonged heating to keep the Nutella creamy and donuts soft.
For longer storage, freeze the donuts without filling. Defrost and then fill with Nutella before serving.
Healthier Alternatives
If you want a slightly healthier take, try baking the donuts instead of frying. Baking produces less oily treats, though the texture may be less crispy.
Using whole wheat flour or reducing sugar can also lighten the calorie load. Alternatively, swap Nutella for a natural hazelnut spread with less sugar.
Frequently Asked Questions
Can I use instant yeast instead of active dry yeast?
Yes, but adjust the rising times as instant yeast works faster. Also, mix it directly with flour, not in the warm milk.
What if my dough is too sticky?
Add flour gradually during kneading. Avoid adding too much to keep donuts soft.
How do I know when the oil is hot enough?
Use a candy thermometer or test by dropping a small piece of dough in the oil. It should bubble and float immediately.
Can I make these donuts gluten-free?
Gluten-free dough is tricky for donuts but possible with special blends and xanthan gum. Texture will differ.
Why You Should Try Homemade Nutella-Filled Donuts Today
Making homemade Nutella-filled donuts is more than just baking—it’s an experience. From the joy of kneading dough to the aroma of frying donuts, every step fills your kitchen with warmth. The final bite combines soft dough with a rich, melted chocolate-hazelnut center that feels like a hug.
Unlike store-bought options, these donuts are free from preservatives and artificial flavors. Plus, you control the quality of ingredients.
Whether for a special occasion, a weekend treat, or a delightful breakfast, homemade Nutella-filled donuts always impress.
Conclusion
Homemade Nutella-filled donuts are an irresistible treat that combines fluffy dough with a creamy, chocolate-hazelnut surprise. Though they require a bit of time and effort, the process is straightforward and enjoyable.
By following this detailed guide, you’ll create fresh, bakery-style donuts that your family and friends will love. Remember to keep an eye on dough rising, maintain the right frying temperature, and fill the donuts while warm for the best results.