
Introduction: Start Your Day With a Touch of Sweet Luxury
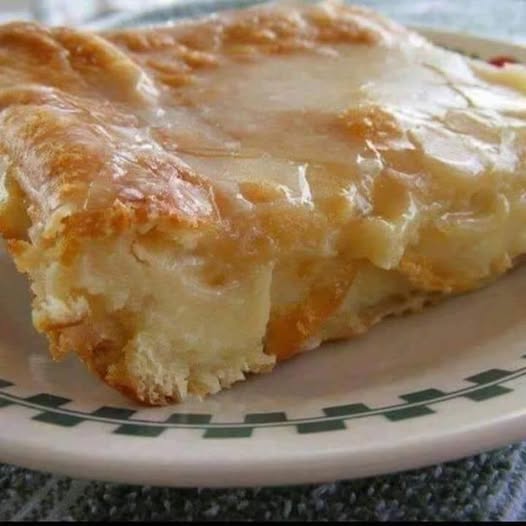
When it comes to morning routines, nothing feels more indulgent than biting into a flaky, buttery, cream cheese-filled pastry that feels like it came straight from a Parisian bakery. But here’s the best part—you don’t need to wake up at dawn or be a professional baker to enjoy this luxury. The Easy Breakfast Cheese Danish is a quick, satisfying, and irresistibly creamy pastry that you can whip up with minimal effort and basic kitchen staples.
This recipe is perfect for anyone seeking a comforting breakfast, an elegant brunch addition, or a cozy dessert-style snack. Let’s dive into this foolproof recipe and uncover how you can make the perfect cheese Danish from the comfort of your own kitchen.
Why You’ll Love This Easy Cheese Danish
- Simple Ingredients: No need to hunt down rare items—everything is already in your pantry or fridge.
- Quick Prep Time: Ready for the oven in just 10 minutes.
- Incredible Texture: Flaky, golden pastry wrapped around creamy, sweet cheese.
- Customizable Flavors: Add fruit, spices, or glazes for your personal twist.
- Budget-Friendly: Costs a fraction of store-bought pastries but tastes even better.
Ingredients You’ll Need for Breakfast Cheese Danish
You only need a few ingredients to create this dreamy pastry:
- 1 package refrigerated crescent roll dough or puff pastry sheets
- 4 oz cream cheese, softened
- ¼ cup granulated sugar
- 1 tsp vanilla extract
- 1 tsp lemon juice (optional but brightens the flavor)
- 1 egg, beaten (for egg wash)
- Powdered sugar (optional, for garnish)
- Fruit preserves (optional for added flavor)
These pantry staples transform into a bakery-style treat with hardly any effort.
Step-by-Step Instructions for Making the Perfect Cheese Danish
Step 1: Prepare the Cream Cheese Filling
In a medium-sized mixing bowl, combine the softened cream cheese, granulated sugar, vanilla extract, and lemon juice. Beat with a hand mixer or whisk until the mixture becomes light, smooth, and creamy. Set it aside while you prepare the dough.
Step 2: Roll Out the Dough
Unroll your crescent dough and separate it into rectangles. Press together the perforated seams if using crescent rolls. You can also substitute puff pastry, which gives the Danish a flakier, richer texture. Place the dough on a parchment-lined baking sheet for easy cleanup.
Step 3: Add the Filling
Place a tablespoon of cream cheese mixture into the center of each rectangle. Use a spoon or spatula to spread the filling slightly, keeping it away from the edges so the pastry can puff up without spilling.
Step 4: Fold the Pastry
You can fold the dough over the filling to form simple pockets, or get fancy with a braid-style design. Press the edges gently to seal. Brush the tops with beaten egg to help achieve that golden, glossy finish when baked.
Step 5: Bake to Golden Perfection
Preheat your oven to 375°F (190°C). Bake for 15 to 18 minutes or until golden brown and puffed. Let the pastries cool for a few minutes before serving. For a more indulgent touch, dust with powdered sugar or drizzle a quick glaze on top.
Flavor Variations to Try
The base recipe is already divine, but it also serves as a blank canvas for creativity. Try these twists:
Fruit-Filled Danish
Add a teaspoon of raspberry, apricot, blueberry, or strawberry preserves to the center before folding the dough. The fruit blends perfectly with the cheese filling.
Nutty Delight
Sprinkle finely chopped almonds or pecans on top of the cream cheese before folding.
Cinnamon Sugar Swirl
Mix cinnamon into the filling or sprinkle cinnamon sugar on top before baking.
Glazed Finish
Whisk together powdered sugar with a splash of milk or lemon juice to make a drizzle glaze. Pour over cooled Danish for extra sweetness.
Tips for the Best Cheese Danish
- Use cold dough: It’s easier to handle and less likely to stick or tear.
- Don’t overfill: Too much filling may cause the Danish to burst open while baking.
- Chill before baking: A quick 5-minute chill in the fridge helps maintain shape.
- Line your baking sheet: Parchment paper ensures easy release and cleanup.
Serving Suggestions
Serve warm for the best texture and flavor. Pair with coffee, chai, or a fruit smoothie for a complete breakfast. They also shine on brunch tables alongside fruit salad, bacon, or scrambled eggs.
For dessert, top with a scoop of vanilla ice cream or whipped cream for a creamy contrast.
Storing and Reheating Cheese Danish
Refrigeration
Store leftovers in an airtight container in the refrigerator for up to 3 days. Reheat in a toaster oven or air fryer for a crispy bite.
Freezing
Wrap individual pastries in plastic wrap and then foil. Freeze for up to one month. Thaw in the fridge overnight, then reheat before serving.
Nutrition Facts (Per Serving)
Here’s a rough estimate per Danish (based on using crescent dough and basic filling):
- Calories: 220
- Total Fat: 13g
- Saturated Fat: 7g
- Cholesterol: 35mg
- Sodium: 250mg
- Sugar: 10g
- Protein: 4g
Nutritional content will vary based on specific ingredients and portion sizes.
Frequently Asked Questions
Can I make these the night before?
Yes! Assemble the Danish, cover with plastic wrap, and refrigerate overnight. Bake fresh in the morning.
Can I use low-fat cream cheese?
You can, but full-fat cream cheese yields a richer and creamier texture.
What’s the best dough to use?
Crescent roll dough is convenient, but puff pastry creates a more authentic, flaky Danish.
Can I add eggs or savory ingredients?
Absolutely. Add scrambled eggs, ham, or cheese to the filling for a savory variation.
How This Recipe Compares to Bakery Danishes
While bakery Danishes are often loaded with preservatives, this homemade version gives you fresh ingredients, full control of sweetness, and endless customization. Plus, nothing beats the smell of warm pastries coming straight from your own oven.
Homemade also means no artificial flavorings or extra fillers. It’s comfort food done right—and fast.
Cheese Danish Around the World
The Danish pastry actually originated in Austria, not Denmark, and was brought to Denmark by Austrian bakers. Since then, it has evolved into a variety of sweet and savory creations worldwide.
In America, cheese Danish is typically sweet and topped with glaze. In Europe, you might find savory versions with herbs and vegetables. No matter the version, the combination of dough and creamy filling is universally loved.
Final Thoughts: Make Mornings Better With Cheese Danish
Whether you’re looking for a way to elevate your weekday breakfast, need an easy weekend treat, or want to impress guests at brunch, the Easy Breakfast Cheese Danish is a recipe worth saving. It’s quick, flexible, and delivers a flavor that rivals your favorite coffee shop.