
Introduction to the Perfect Sweet Treat
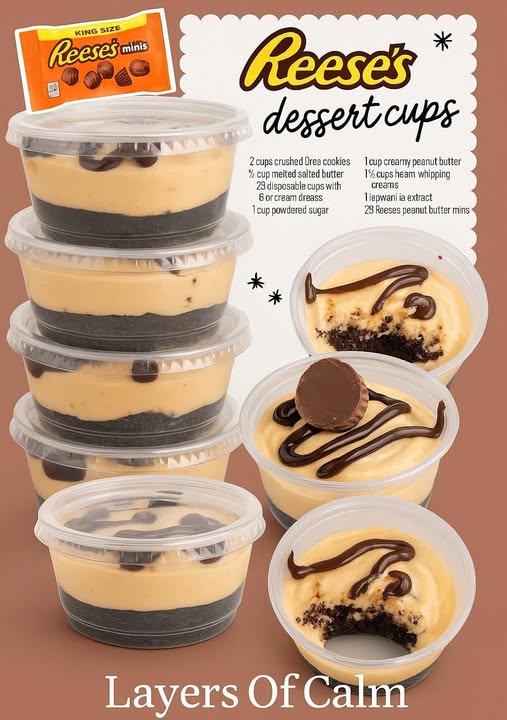
Chocolate and peanut butter are a legendary duo in the dessert world. Few flavor combinations offer the same rich, satisfying contrast—sweet and creamy chocolate pairs perfectly with salty, nutty peanut butter. That’s exactly what you’ll experience with Chocolate Peanut Butter Dessert Cups. These no-bake delights are easy to make, freezer-friendly, and guaranteed to impress both kids and adults alike.
Whether you're preparing for a holiday gathering, birthday party, or just want something indulgent at home, these dessert cups deliver flavor and texture in every bite. With minimal effort and ingredients, you’ll create something that feels gourmet without even turning on the oven.
Why You’ll Love These Dessert Cups
These cups are more than just a dessert. They’re a go-to treat for countless occasions. Here’s why they’re beloved:
- Easy to Make: No baking, no complicated steps, no hassle.
- Minimal Ingredients: You likely have everything in your pantry already.
- Crowd-Pleaser: Perfect for parties, potlucks, or gifting.
- Customizable: Switch up the nut butter or add toppings.
- Freezer-Friendly: Keep them on hand for when cravings strike.
Once you try them, you’ll be hooked. Let’s explore everything that makes these chocolate peanut butter dessert cups the must-have recipe in your collection.
Ingredients You Need
You only need a handful of ingredients to create magic. These simple components come together to form an irresistible dessert.
Main Ingredients:
- 1 cup semi-sweet chocolate chips
- ½ cup creamy peanut butter (or almond butter for variation)
- 2 tablespoons unsalted butter
- ¼ cup powdered sugar
- 1 teaspoon vanilla extract
- Pinch of sea salt
Optional Toppings:
- Crushed roasted peanuts
- Drizzle of white or dark chocolate
- Flaky sea salt
- Mini chocolate chips
- Chopped pretzels or caramel bits
All ingredients should be at room temperature for the best consistency. Use high-quality chocolate for a richer flavor.
How to Make Chocolate Peanut Butter Dessert Cups
This recipe is incredibly simple and can be made in under 30 minutes (plus chilling time). You’ll need a mini muffin tin and paper liners for the best results.
Step 1: Melt the Chocolate
In a microwave-safe bowl, add the chocolate chips. Microwave in 30-second intervals, stirring well each time. Continue until the chocolate is smooth and completely melted.
Step 2: Form the Chocolate Base
Line a mini muffin tin with paper liners. Spoon about 1 tablespoon of melted chocolate into each liner. Tilt and swirl the tray to coat the sides. Place the tin in the freezer for 10–15 minutes to allow the base to harden.
Step 3: Mix the Peanut Butter Filling
In a mixing bowl, combine peanut butter, unsalted butter, powdered sugar, vanilla extract, and sea salt. Mix until the filling is smooth, thick, and creamy. Taste and adjust the sugar or salt as needed.
Step 4: Fill the Chocolate Cups
Remove the tin from the freezer. Add about 1 tablespoon of peanut butter mixture to each chocolate shell. Flatten the tops slightly with the back of a spoon or spatula.
Step 5: Seal with More Chocolate
Add another spoonful of melted chocolate on top of the peanut butter filling. Gently tap the tin on the counter to smooth the tops and release air bubbles. Sprinkle with optional toppings.
Step 6: Chill and Set
Place the tray back in the freezer or refrigerator. Let the dessert cups chill for at least 20 minutes, or until fully firm. Once set, remove the paper liners and store the cups in an airtight container.
Pro Tips for Perfect Dessert Cups
Even though this recipe is simple, these tips will help you take it to the next level.
- Use silicone muffin liners for easy release and perfect edges.
- Add coconut oil to the chocolate (1 tsp per cup) for a glossier finish and softer texture.
- Let cups sit at room temperature for 2–3 minutes before serving to enhance texture.
- Double the batch—you'll be surprised how fast they disappear.
- Use a piping bag for the peanut butter filling if you want clean, neat layers.
Customize Your Chocolate Peanut Butter Cups
This recipe is a great base for creativity. Here are some fun and delicious variations:
Different Nut Butters
Swap peanut butter with:
- Almond butter
- Cashew butter
- Sunflower seed butter (for nut-free option)
- Nutella or chocolate hazelnut spread
Flavor Additions
- Add a layer of caramel sauce over the peanut butter.
- Sprinkle in crushed graham crackers for texture.
- Stir a pinch of cinnamon or espresso powder into the chocolate.
- Mix in mini rice crisps for a crunchy center.
Holiday-Themed Variants
Use colored chocolate or sprinkles to match seasons:
- Red and green for Christmas
- Pink and red for Valentine’s Day
- Orange and black for Halloween
Serving and Storage Ideas
These cups are as practical as they are delicious. Here’s how to store and serve them:
Serving Suggestions:
- Serve with coffee or hot chocolate.
- Add to dessert platters or charcuterie boards.
- Wrap individually and gift in treat bags.
- Place on cake stands for a charming display.
Storage:
- Refrigerator: Store in an airtight container for up to 10 days.
- Freezer: Freeze for up to 3 months. Thaw for 5–10 minutes before enjoying.
Why These Dessert Cups Are So Popular
There’s no denying the appeal of chocolate and peanut butter. But why do these cups stand out?
- Portion Control: One or two satisfy without overindulgence.
- Texture Harmony: Crisp chocolate and smooth filling make every bite delightful.
- Effortless Presentation: They look polished and beautiful with almost no effort.
- Versatility: Works for birthdays, brunches, holidays, or midnight snacks.
- Kid-Friendly: Safe, simple, and fun for kids to make and eat.
No one can resist the layered richness, whether they’re sweet-toothed kids or gourmet-loving adults.
Fun Ideas for Gifting
Homemade gifts are always appreciated, and these cups are perfect for that. Here’s how you can package them:
- Place in decorative mini cupcake boxes.
- Use themed wrapping for holidays.
- Add a handwritten label with flavors and ingredients.
- Pair with a small coffee bag for a sweet gift set.
These make ideal party favors, teacher appreciation gifts, or thoughtful treats for neighbors.
Frequently Asked Questions (FAQs)
Can I make these without paper liners?
Yes, but silicone molds work better if not using liners. Without either, greasing the tin thoroughly is essential.
Can I make them dairy-free?
Absolutely. Use dairy-free chocolate chips and a plant-based butter alternative.
Can I use chunky peanut butter?
Yes, but it will change the texture. For smoother results, stick to creamy.
What size should I make them?
Mini muffin tins work best, but standard-size muffin tins can be used for larger servings.
Conclusion: A Must-Try Dessert for Every Occasion
Chocolate Peanut Butter Dessert Cups are a timeless favorite. They check all the boxes—easy to make, deliciously satisfying, endlessly customizable, and visually appealing. Whether you’re a seasoned baker or a kitchen newbie, this recipe belongs in your dessert rotation.